First up is an introduction to weathering with pastel powders. I'm using "Doc O'Brien's" for this tutorial. I'm happy with the product, and you get a few colours it's harder to match with art store pastel sticks, but you can do this much less expensively with generic art pastels and some sandpaper.
This is the un-weathered cab. I have base coated the interior and painted the seats.

The colors I'm using are "Rust Red," "Rust Brown," "Grimy Black" and "Dirt Brown." I will use Testors enamel thinner sparingly as we go - and that bottle will likely last me several years.

I bought a $3 pack of crappy brushes to use with powders. I took one of them and cut it off about 10mm or 1/4" from the ferrule. Using this brush I applied "Rust Red" in a generous layer. You can blow off, brush off or wipe off excess - like I do in the next step.
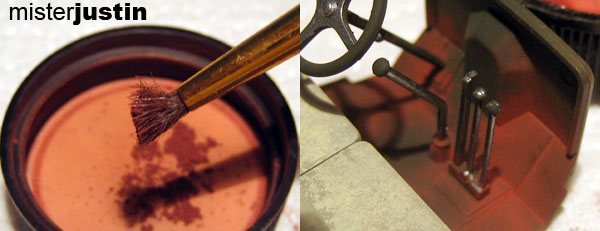
Using another cheap brush I applied some enamel thinner and wiped away a bit of the "Rust Red" powder. This also helps get the remaining powder into the recesses and will bind it more permanently to the model. In the image on the right I have added the "Rust Brown" powder.
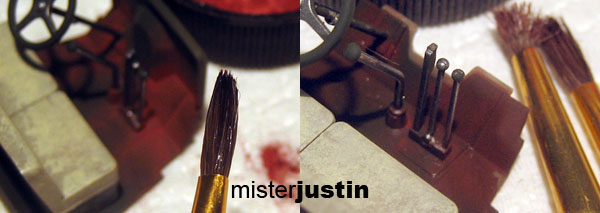
Application of more thinner (left) and "Dirt Brown" (right).
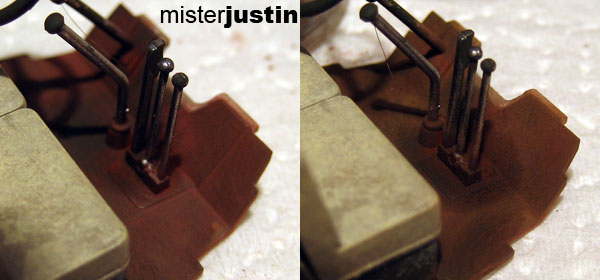
Application of "Grimy Black" gives us the finished image for the deck plate. In the bottom image you can see where I stippled the rust near where feet would kick getting into the truck. Always remember that corners will be more heavily weathered in most vehicles. I applied additional black, and then thinned heavily, where the driver's feet would rub.

These techniques and materials can be used to create incredibly realistic rust, dirt and grime and are very well suited to vehicles. Use them on engines, treads, bolts, hatches... anywhere you'd expect to find gunk and rust.
Next up... playing with oil!
8 comments:
hi is roxas from bc
instead of enamel thiner can i use turpentine?
thanks ;)
You can indeed. I prefer enamel thinner though and you can get a small bottle of it on the cheap. Turpentine (or turpenoid) I also find more likely to discolor the base coat.
Nice tutorial, sir! I was wondering if you had any advice for applying these to infantry models?
With infantry models you typically treat this technique more like a wash. You can mix thinner and powder in a dish palette and apply it more sparingly. That's how I typically do it anyhow and I haven't seen a pastel/infantry tutorial yet.
Thanks for the advice! I have the same problem of not being able to find a single tutorial on pigments that doesn't concern vehicles... Should make experimenting interesting though...
Fantastic stuff. Just found you in a link on FTW.
Really nice to see a simple break down of the work. A lot of people forget to show the work and just talk through it.
I will have to dig a bit deeper into your site now ^_-.
Outstanding!!! I will definitely try this.
Thank you FTW! Not only have I been able to share a tutorial -- but here's Grey Death, whom I lost track of ages ago, commenting!
I'm glad everyone liked it -- and your feedback just encourages me to get the next tutorial up sooner instead of later.
Remember, I always take requests -- although vehicles are what I do best so tutorials tend to be slanted in that direction.
Post a Comment